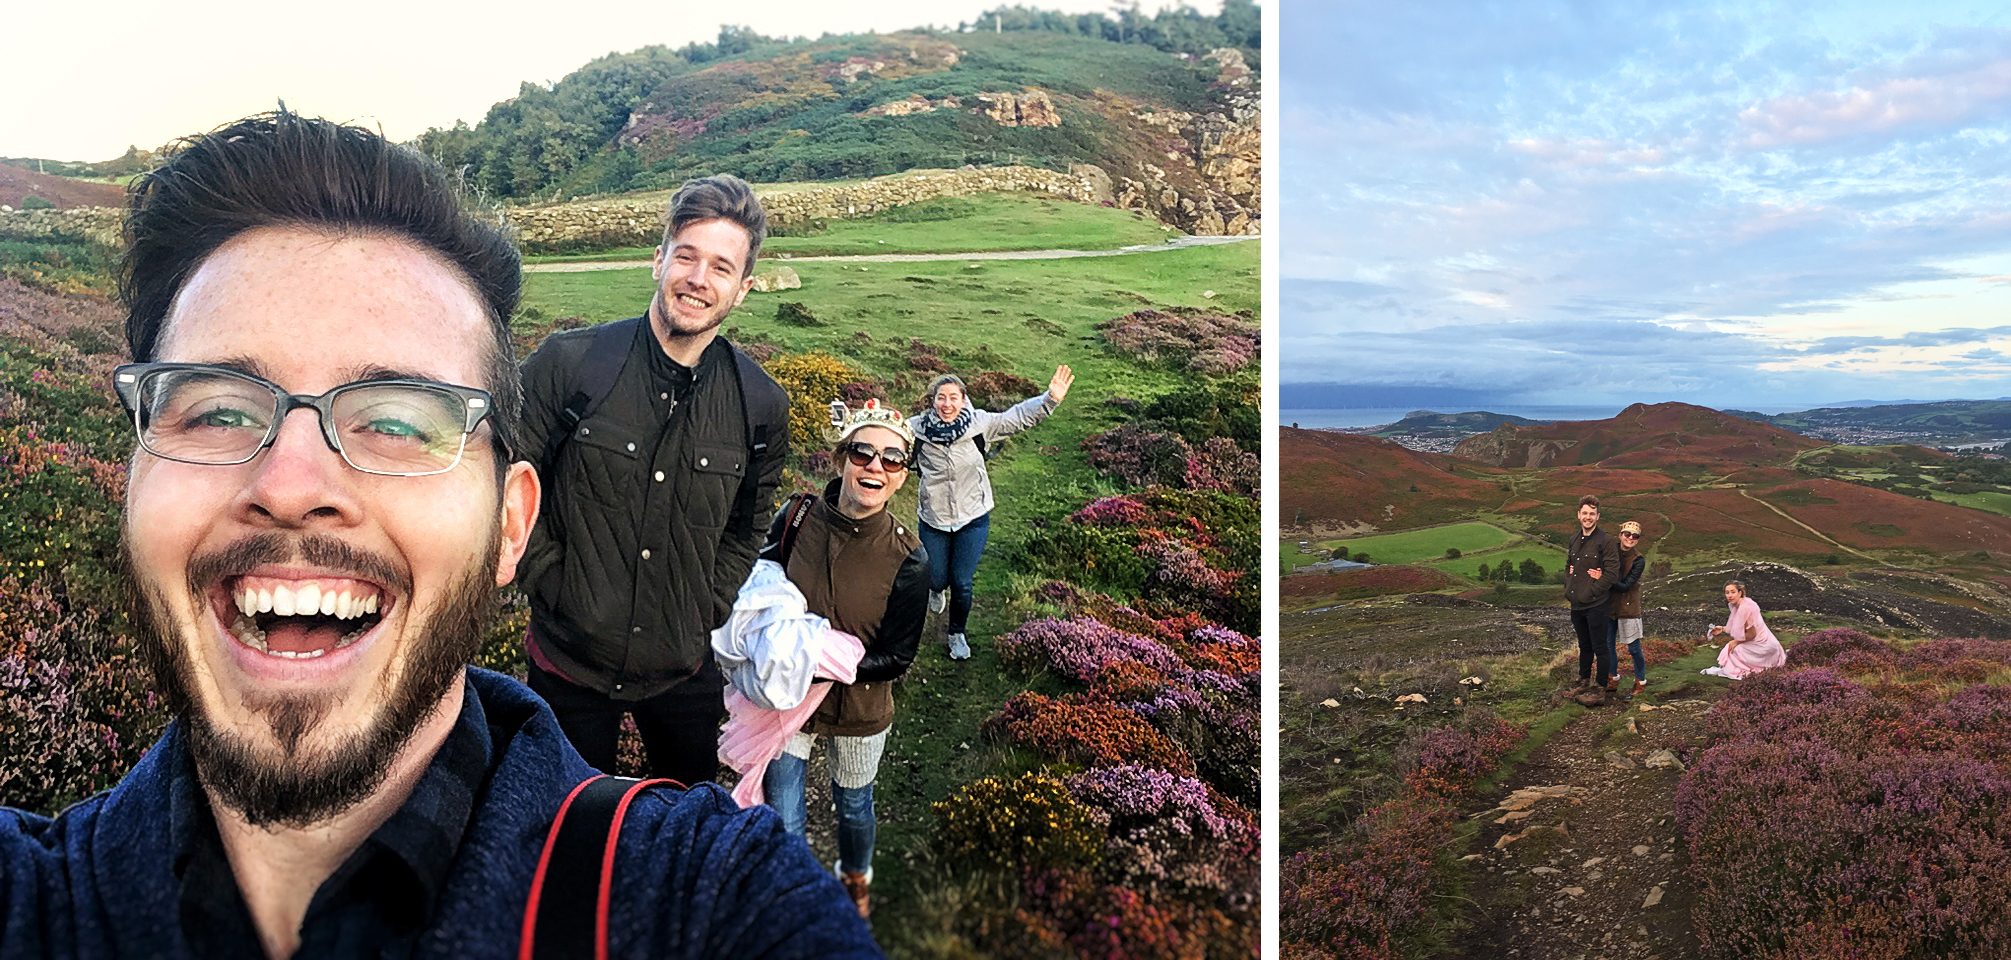
Once upon a time ... I happened to find myself in North Wales (like you do) visiting the incredibly talented Niall Scanlon (my good friend and favorite Welsh dude) and his girlfriend (also my good friend, but not Welsh), Loren Schmidt. (Yes, I did accidentally introduced them via one of my photography meet ups and they are now the most disgustingly adorable couple ever, you're welcome world.) Anyway, Niall was so gracious as to take Sara, Loren, and me to some of his favorite locations, just to experience the RIDICULOUS beauty that is Wales. (View the UNEDITED iPhone panos below, attempt not to pass out.)


We were hiking up this mountain on the coast and as we crested the top, the wind was about as powerful as the view. Either one could have knocked you over. After taking a minute to convince myself that this was indeed real life, that I was in fact actually standing where I was, and for realz seeing this incredible landscape sprawling out endlessly in all directions - I decided that there was no flippin way I was leaving this magical place without doing a proper photo shoot. Being the brilliant photographer-friend that she is, Loren had a dress on hand that of course turned out to perfectly fit Sara. Obviously.
I'd shot Loren in the pink dress earlier in the day (AT AN EPIC CAVE ON A DIFFERENT MOUNTAIN!?!?! More on that in a future post ... Guys, Wales is just stupid with incredible photo locations, go there), so I figured I'd take the opportunity to get my hottie wife in front of the camera. As she tends to do with everything she does, she slayed it. It was COLD, and did I mention windy? There was wind. Sara legitimately almost blew away at one point when the wind caught the dress like a sail between her legs .... but she is fine, moving on. Barefoot, coatless, and in a super thin dress, Sara modeled her butt off for around 45 minutes like a total champ without one complaint. I shot kind of an insane amount of photos. It's not every day you are in such a place, so you make sure you get something good. Loren also hopped on the opportunity to snag some pics of Sara, and they are all too lovely.
I could go on forever about what a simply perfect day we had. Don't get me started on the picture perfect "afternoon tea" we had in the library of a castle earlier that day ... what is my life? It's perhaps one of my favorite days thus far into my existence, BUT I'm sure no matter how breathtaking the location was, how smokin my wife might be, or how perfectly windblown the dress turned out, most of you are just sitting there thinking, "ROBERT! We get it, Wales is awesome ... NOW TALK ABOUT THE DAMN DRAGON ALREADY!!!!" Fine, geeez you guys, calm down, first look at some photos of sheep real quick ...
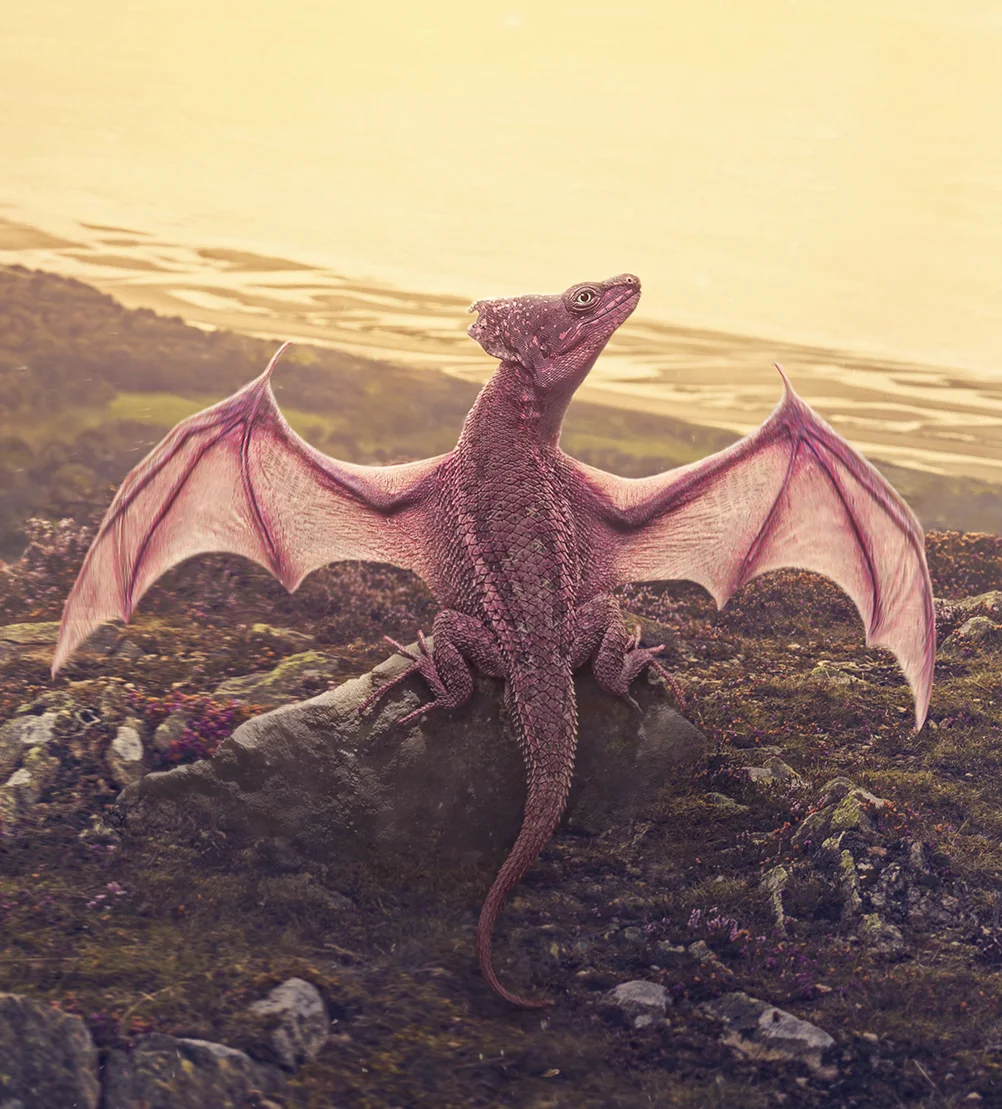
Soooo yeah, remember that other time I created a baby dragon in Photoshop? Well, in the immortal words of Britney ... Oops, I did it again. (Yeah I went there.) I was thinking about how I'd love to grow my audience (weird, right?) and get more recognition for my work ... or whatever, and one of the best things you can do to stand out of the crowd is to figure out something you can do that not everyone else can, and you know, do it! Last time that I used my wizard-y-Photoshop-powers to craft a dragon, the internet sorta lost its mind. Ok, so not the whole internet, but those who saw it seemed to be pretty into it and that blog post is still one of my most popular. I say, give the people what they want! Also, I would be lying to your face if I said I didn't love anything and everything having to do with dragons. So without further ado, I grant to you kind readers, 4 tips for creating a dragon in Photoshop!

TIP ONE - Find the Right Pieces
This can be quite a challenge, but a fun one! I wish I could say that I took all of the images of the critters used to create the dragon, but alas I did not have the time (or the ... zoo?) to go get the images myself. I do always strive to capture as many of the photos used in my edits as possible, but I have no issue tapping into stock images when needed. Especially if I'm going to be editing the living crap out of them, bending, blending, and smooshing them into something that is my own.
One of the most important things to keep an eye out for while hunting for your pieces is the lighting. As is the case with any sort of compositing, you have to be sure the lighting matches. There is some wiggle room here; you can alter the lighting somewhat in post, but you definitely don't want images that are harshly lit from different directions or something like that.

It's a lot of fun hunting lizard pics of all shapes and sizes, but it can certainly be tough to find ones in the right position. Oftentimes (more so with the first dragon I made), you have to keep an eye out for elements you like from MANY pictures. Maybe you only want the head from this one, the eye from here, the feet from there, the tail form this one and so on. Also, as was true with this new dragon, you don't have to stop at lizards - This little pink fellow has bat wings! (Or at least the used to be, now they are dragon wings obvs.) You could go the feathery route and find bird wings you like, maybe bug wings, or be more like my first dragon (seen above) and make a ground type dude.
TIP TWO - Save the Color for Later
Whenever I'm creating a dragon in Photoshop I always (all two times I've done it) start out in black and white. It's so much easier to ignore the colors to begin with and just get the pose/lighting right. You may have noticed that the head was teal, the wings were dark brown and the body was tan.

It would have been too distracting and felt like I was doing a terrible job if I had started right off the bat in color. This new one wasn't too crazy, but the first dragon I made had pieces from all over the place! It can be quite daunting and overwhelming when you're beginning to assemble your pieces, so if you can rule out one major factor, things will move forward much more smoothly.
Please note all the various colors and non-matchy-ness of the pieces in the above gif, but forgive me as it is not ever shown in black and white for comparison. If you'd like to go check out the post about that image you can watch the speed edit and see the black and white portion in action.
TIP THREE - Embrace the Warp Tools
This step may seem like a bit of a cop-out seeing as I have a whole blog post about it already (this is like the zillionth time I've linked to that post, is it annoying yet? ... It is kind of important since this post talks about that post a lot, as you may have noticed ... ), BUT, transforming and warping is such an integral part of creating one of these little dragons that I simply couldn't skip it.

Now, I'm not going to repeat myself and re-explain how things like the Puppet Warp work. Kindly hop on over to my first baby dragon post (seriously though, another link to it? Chill Robert we understand) and you can read all about upping your transform game. I will, however, just briefly reiterate that this is probably the most important step to learn. You are almost never going to find exactly all the right pieces you want in exactly the right positions, so you're going to need to warp and transform them into the shapes and sizes you need.
TIP FOUR - Endless Colors!
Creating magical creatures is super fun because really there aren't any actual rules. You get to choose everything about your little beast and be as creative as you'd like. HAZZAH! One step that I look forward to is figuring out what colors it will be. For this new dragon I decided to match him to the dress. I wanted Sara to appear to be fostering this little guy. ("Him? Guy? But Robert she's pink?" ... SCREW YOUR GENDER COLOR STEREOTYPES I'VE DECIDED HE'S A BOY! .... ) Maybe he fell out of the nest when he was teeny tiny and she took him "under her wing" (see what I did?) and is now his mother figure - so matching their colors just helped play out that little foster parent story. Oh also, the finished image 100% reminds me of the "everything the light touches" scene from The Lion King and I find that quite pleasing ... just sayin.

The first thing I do once I turn the color back on (after I'm done assembling in black and white) is to attempt to match all of my pieces. There is no formula for this - basically just pick one of the body parts you like best and start using adjustment layers (with clipping masks to only affect one part at a time) to match the other body parts to that piece. This usually takes some brightening or darkening like with a brightness/contrast, levels, or curves perhaps, and some color adding and/or altering. I tend to do this with a Hue/Saturation adjustment layer and slide the top slider a bit to alter the colors and then saturate or desaturate as needed. There are endless ways to edit colors so go with what you're comfortable with.
After you've used your various adjustment layers to achieve a cohesive color palette, You can start fussing with the colors overall. As I mentioned, I usually match everything to one body part, but that doesn't mean I'm going to leave it that color. I find one of the fastest and most fun ways to change the overall color is to mess around with a Hue/saturation adjustment layer and just slide the top bar around drastically. You'll be able to take a look at all kinds of wildly different colored versions of your dragon! (As seen above.)
I also love to paint in different colors on a new layer set to the "Overlay" blending mode. I ended up liking my new dragon all one color, but I could have painted in stripes of a different color down his back, or made the skin of his wings a different color, given him spots, and so on. Like I said, you are in full control of all the little details of your new little critter. (Side note ... doesn't actually have to be a baby dragon... you could use all of these tips to make a huge one should you choose.)
I guess the moral of this story is, GO TO WALES!!! But first, do yourself this favor and check out (my beautiful dragon-fostering wife) Sara's blog post all about our trip! As if you needed any more eyeball-meltingly-stellar images of Wales to convince you that you need to go there. But just wait until you hear about the things we ate there! Oh and also, making dragons is tough - but incredibly rewarding! You get to be the monster-making wizard you've always wanted to be (Ok well I have anyway) and are in full control of bringing a new creature to life. Does it have wings, stripes, two tails, is it spiked, smooth, dark, or vibrant, it's all up to you!
