
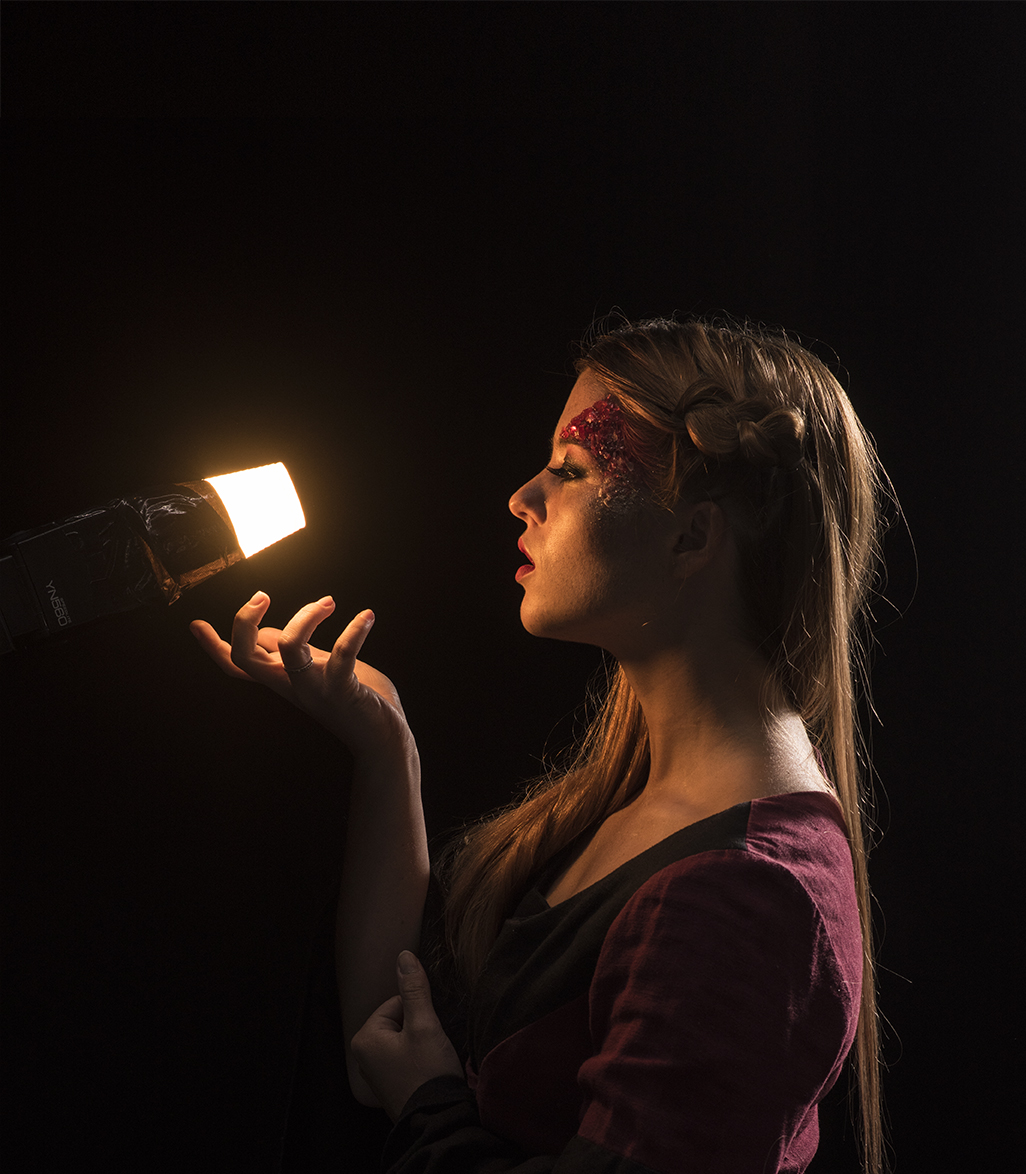
Sometimes even I forget exactly what the term “composite” actually means. Technically it’s just combining more than one image to make a single final picture, like when you do a family picture and Grandpa is looking confusedly off into space like he doesn’t know how to be in a picture. (He always does that. GRANDPA LOOK HERE!!) So, you take the one image where he is mostly looking at the camera and kinda smiling and replace his head in the other photo where everyone else looks good … That’s a composite. (Not to throw shade at my Grandpa, he is an 80-year old champion, whom I love.) I’m so used to shooting a subject in the studio and then clipping them off of their background to place them somewhere else, that in my brain, that process has taken the place of what it (my brain) believes is a composite. For the above image (and also below, I guess), I created the finished composited piece of art without ever cutting out the subject.

Let’s be real here friends, I definitely wanted to cut her out …. this was an epic internal war for me. Even when I shoot a subject on location (aka do not need to cut them out and put them somewhere because obviously they are already there), I still almost always end up cutting them out so I can affect them separately from the background. After all, Photoshop is a selective editing program, ammiright? (I am; it is.)
You see, this is the third image I created for my in-depth compositing tutorial. I’d already made two other images (this one and this one, also seen below if you don’t want to go check out the other blog posts) in the tutorial showing how to do things like cut out hair, or master the pen tool, paint in lighting and highlight details, and I pretty much ran you through my whole process of compositing a studio-shot subject into an environment. For the final video in the tutorial I wanted to do my entire edit from start to finish in one video clip.

So far, with the first two composites in the tutorial, everything had been broken up into sections so they could be more easily digested (you’re welcome), but I wanted to show more accurately how I work. Because in all seriousness I almost never do every step perfectly in the same order, or even stick to one task until that task is finished. I’m basically a creative A.D.D. storm randomly striking everything all at once. I just keep working on whatever seems right at that moment until I can’t find anything else I’d like to change.

Please note the crazy awesome makeup by Natalie Junker! Yes, she did glue candy to her face. Like a boss.
To help cut down on the length of the full-edit-in-one-clip video (and also because I hadn’t done it for the other two composites), I decided I was not under any circumstances going to cut out my subject. You can create awesome composited images by building up textures to create some atmosphere. The audience doesn’t actually have to be able to discern where exactly she is - sure I could have placed her in a cave or something, but I liked her just being in a dark abyss. The main focus of the image is obviously the magic fire and her face. You don’t really need more than that. I used some fire and sparks, smoke, and some ….”inferno?” to create the final look and feel of the surroundings.

Anyway, stop reading my rambling and listen to it instead! Below is a little excerpt from the full video tutorial of yours truly editing part of the image and talking about it. If this just isn’t enough for you and you’d like to see the entire process of this image or the more in-depth broken down edits of the other two images, well you are in luck!! Because for the next week you can use code “robertpost15” at checkout to snag your copy of my tutorial for 15% off! *gasp* Or, you know, just enjoy the short clip below and be happy with that. You do you.
